建议先阅读《springmvc工作原理》
本文环境:
JDK 1.8
IDEA 2021.1.3
默认你已经会使用Maven和JavaWEB了。
1:新建MavenWeb项目
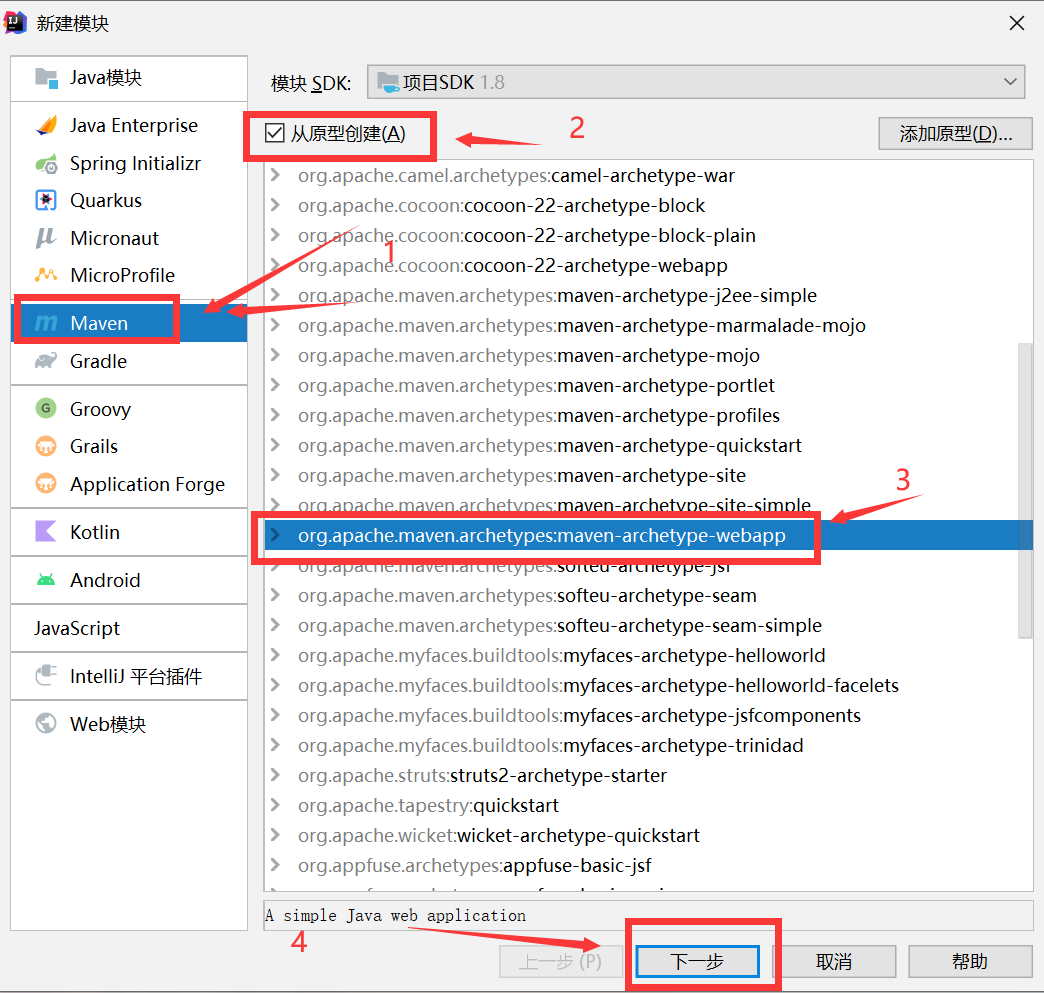
- 选择Maven工程
- 勾选从模板中创建
- 选择webapp模板
- 点击下一步
2:设置具体项目名称和位置
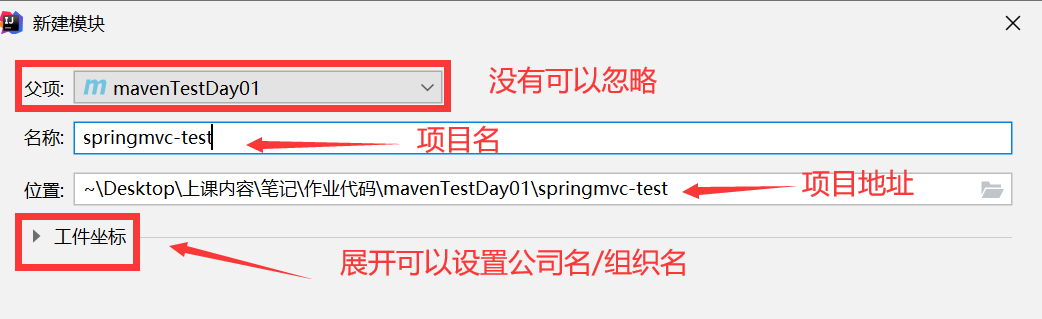
如果没有父项目,最上面的是公司名/组织名。
项目名:建议全小写,以-分割(我上面父项目写的不规范)
位置:你项目在电脑上存放的地址,路径可以存在中文(项目中不要使用中文路径)
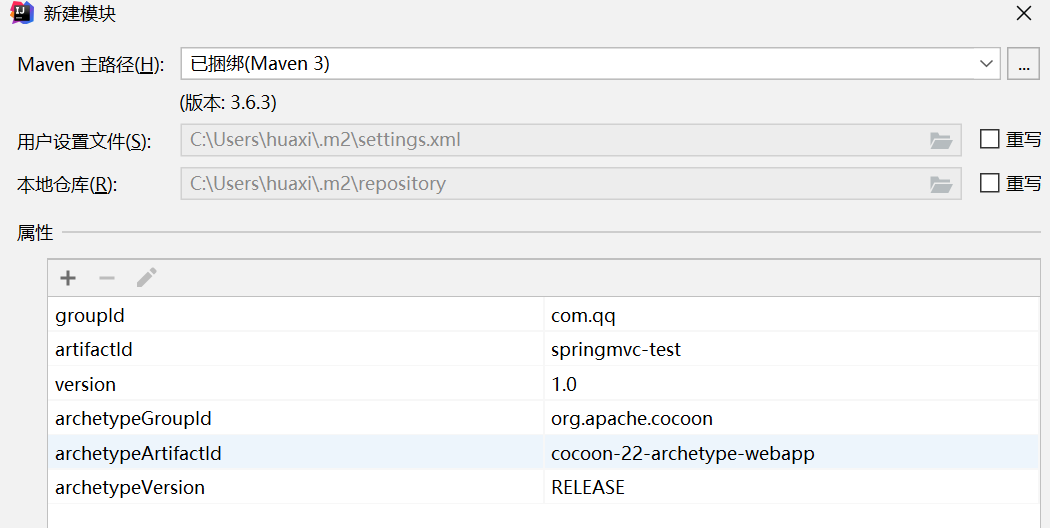
原封不动即可。
初次会下载一堆依赖,请耐心等待。
3:导入依赖
我们需要修改pom.xml文件。
导入依赖:
1
2
3
4
5
6
7
8
9
10
11
12
13
14
15
16
17
18
19
|
<dependency>
<groupId>org.springframework</groupId>
<artifactId>spring-web</artifactId>
<version>${spring.version}</version>
</dependency>
<dependency>
<groupId>org.springframework</groupId>
<artifactId>spring-webmvc</artifactId>
<version>${spring.version}</version>
</dependency>
<dependency>
<groupId>javax.servlet</groupId>
<artifactId>javax.servlet-api</artifactId>
<version>4.0.1</version>
<scope>provided</scope>
</dependency>
|
因为我们未来可能会导入一系列spring的依赖,为了防止依赖冲突,一个解决的办法是使用统一的版本号。
上面把版本号做为了一个变量使用,我们需要提前定义${spring.version}变量。
定义变量:
1
2
|
<spring.version>5.3.20</spring.version>
|
tomcat插件依赖:
我们将tomcat做为插件来导入到项目中运行,是的程序的构建到发布更加的便捷。
1
2
3
4
5
6
7
8
9
10
11
12
13
14
15
16
17
18
| <plugins>
<plugin>
<groupId>org.apache.tomcat.maven</groupId>
<artifactId>tomcat7-maven-plugin</artifactId>
<version>2.2</version>
<configuration>
<path>/</path>
<port>8080</port>
<server>tomcat7</server>
</configuration>
</plugin>
</plugins>
|
4:配置文件
手动添加正确的目录结构:
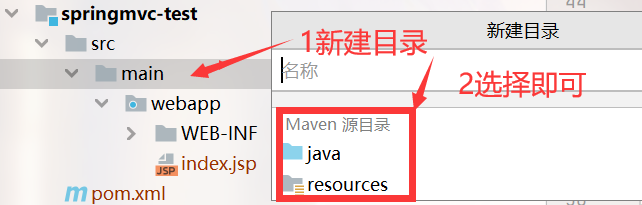
我们在目录结构中src/main上面右键,新建目录。
(IDEA自动提示Maven源目录,点击即可)
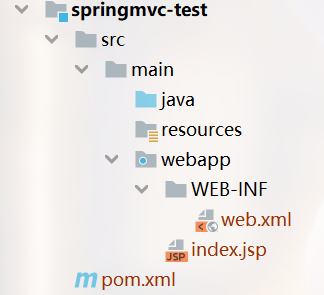
IDEA中如果目录设置正确图标会不一样的,如上图。
添加配置文件springmvc.xml:
1
2
3
4
5
6
7
8
9
10
11
12
13
14
15
16
| <?xml version="1.0" encoding="UTF-8"?>
<beans xmlns="http://www.springframework.org/schema/beans"
xmlns:xsi="http://www.w3.org/2001/XMLSchema-instance"
xmlns:p="http://www.springframework.org/schema/p"
xmlns:mvc="http://www.springframework.org/schema/mvc"
xmlns:context="http://www.springframework.org/schema/context"
xsi:schemaLocation="
http://www.springframework.org/schema/beans
http://www.springframework.org/schema/beans/spring-beans-4.3.xsd
http://www.springframework.org/schema/context
http://www.springframework.org/schema/context/spring-context-4.3.xsd
http://www.springframework.org/schema/mvc
http://www.springframework.org/schema/mvc/spring-mvc-4.3.xsd
">
</beans>
|
这个文件在resources目录下,你可以写好复制过去,而无需改动内容。
唯一后来需要修改的就是去配置用户控制器。
修改配置文件web.xml:
1
2
3
4
5
6
7
8
9
10
11
12
13
14
15
16
17
18
19
20
21
22
23
24
| <web-app xmlns="http://xmlns.jcp.org/xml/ns/javaee"
xmlns:xsi="http://www.w3.org/2001/XMLSchema-instance"
xsi:schemaLocation="http://xmlns.jcp.org/xml/ns/javaee http://xmlns.jcp.org/xml/ns/javaee/web-app_4_0.xsd"
version="4.0">
<display-name>Archetype Created Web Application</display-name>
<servlet>
<servlet-name>springmvc</servlet-name>
<servlet-class>org.springframework.web.servlet.DispatcherServlet</servlet-class>
<init-param>
<param-name>contextConfigLocation</param-name>
<param-value>classpath:springmvc.xml</param-value>
</init-param>
<load-on-startup>1</load-on-startup>
</servlet>
<servlet-mapping>
<servlet-name>springmvc</servlet-name>
<url-pattern>/</url-pattern>
</servlet-mapping>
</web-app>
|
这个文件在webapp/WEB-INF文件夹里面。
上面做了两件事:
- 修改xml验证语法版本为4.0
- 设置了核心控制器的配置,使得核心控制器过滤一切请求
5:编写用户控制器
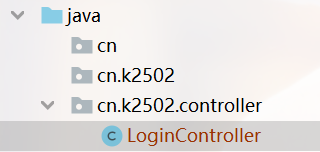
我们还是在java目录下编写代码,按照规范包名.类名。
我们创建一个类:cn.k2502.controller.LoginController
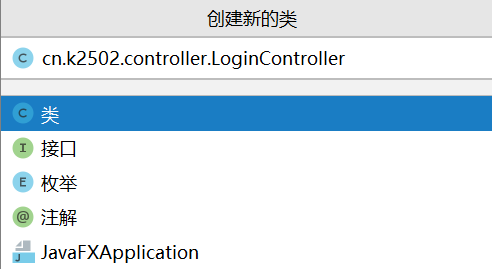
这样的好处是我们可以同时得到包和类。
我们让他继承一个接口Controller(快捷键Alt+回车键导入)

暂时选择下面一个(上面是是注解版本)
实现他的抽象方法即可。

和Servlet一样,在这里面编写你需要处理的流程即可。
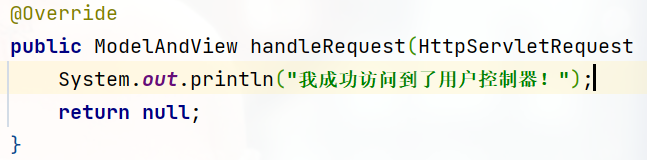
这里仅仅只是测试是否有效。
写完后需要去核心控制器的配置文件springmvc.xml里面添加配置。
1
| <bean name="/login" class="cn.k2502.controller.LoginController"></bean>
|
6:启动服务器
这里因为配置了插件,所以启动方式在这里。

- 选择Maven
- 选择当前项目
- 选择插件
- 选择tomcat7
- 选择run右键运行
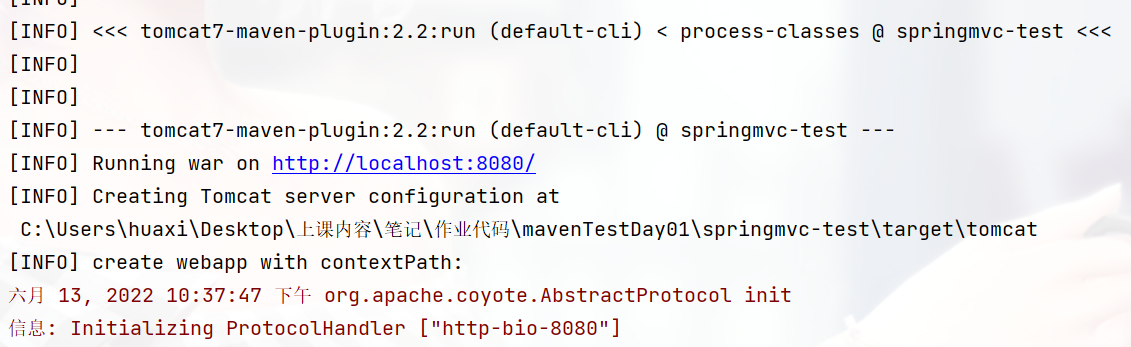
运行成功,我们访问一些试试看。
因为没有配置项目名,所以我们直接访问http://localhost:8080/login
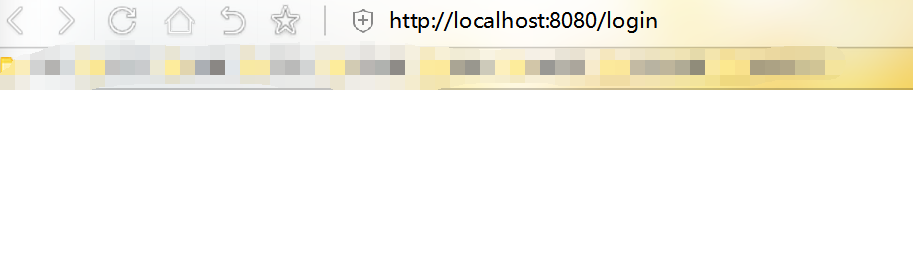
因为本来就没有写页面,所以没有显示是正常的,我们去控制台看看。
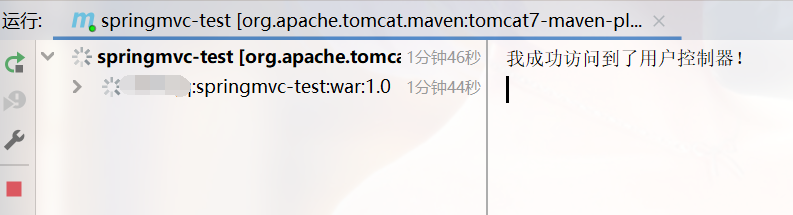
访问成功。